This is the third and final article addressing the three basic factors of exposure: aperture, shutter speed, and ISO.
For beginners, ISO initially seems like a mystery setting, best left on auto. I assure you, with some basic knowledge of ISO you will become a much more versatile photographer in every situation. ISO (not an acronym!) is the third and final parameter that affects exposure. ISO is a measure of how sensitive the sensor is to light. Low ISOs correspond to less sensitivity. Conversely, high ISOs correspond to high sensitivity. For example, with shutter speed and aperture held constant, a photo taken at ISO 100 will be much darker than a photo shot at ISO 800.
A great analogy for ISO is sun tanning. If you use a higher SPF sunscreen, the sun takes longer to tan your skin – your skin is less sensitive to the sun. This high SPF, less sensitive skin is analogous to a low ISO. A low ISO is much less sensitive to the sun in comparison to ISO 800 (equivalent of low SPF sunscreen). Just remember, the less sensitive (the lower the ISO), the more light you need for correct exposure.
Which ISO Should I Use
First of all, take your ISO off of auto – forever. Try to keep ISO as low as possible to minimize noise. On a sunny day, ISO 100 is great. Inside, ISO 800 may be appropriate. There is more bright light outside than inside, so your sensor doesn’t need to be as sensitive – you choose the low ISO 100. The beauty of ISO is that you can change the image exposure without changing the nature of the image – that is, you aren’t affecting DoF or bokeh by changing the aperture, and you aren’t affecting camera shake/blur with shutter speed. You only affect brightness of the exposure and the amount of digital noise in the image. By dialing in an ISO of 800 when we go inside, we are making the camera more sensitive to light to make up for the decrease in ambient light, all the while keeping a constant f-stop and shutter speed.
Noise (Grain)
Well we can’t have our cake and eat it too. If you jack up your ISO to the incredible maximums advertised by the camera industry, you will create an image plagued by digital noise. The higher the ISO, the more noise. Every camera has a maximum subjective ISO that shooters try not to exceed. Beyond that maximum, images become unusable for most applications. Note that noise becomes especially prevalent in the shadows of an image, and is less noticeable in the highlights and white of your image. Also, noise is difficult to see on the LCD of your camera, but much more visible when editing on the computer. Also note that level of acceptable noise can vary depending on the application intended for the image – noise will show much more on an image printed very large. Printed small, noise can be less noticeable. On a computer screen noise is much more noticeable than in print. Higher end cameras have better high ISO performance – you get what you pay for. You should experiment by varying your ISO in a controlled environment and looking at your images on the computer to determine the ISO limits of your camera. Finally, a healthy dose of noise can represent film grain and be desirable if you know what you’re doing.
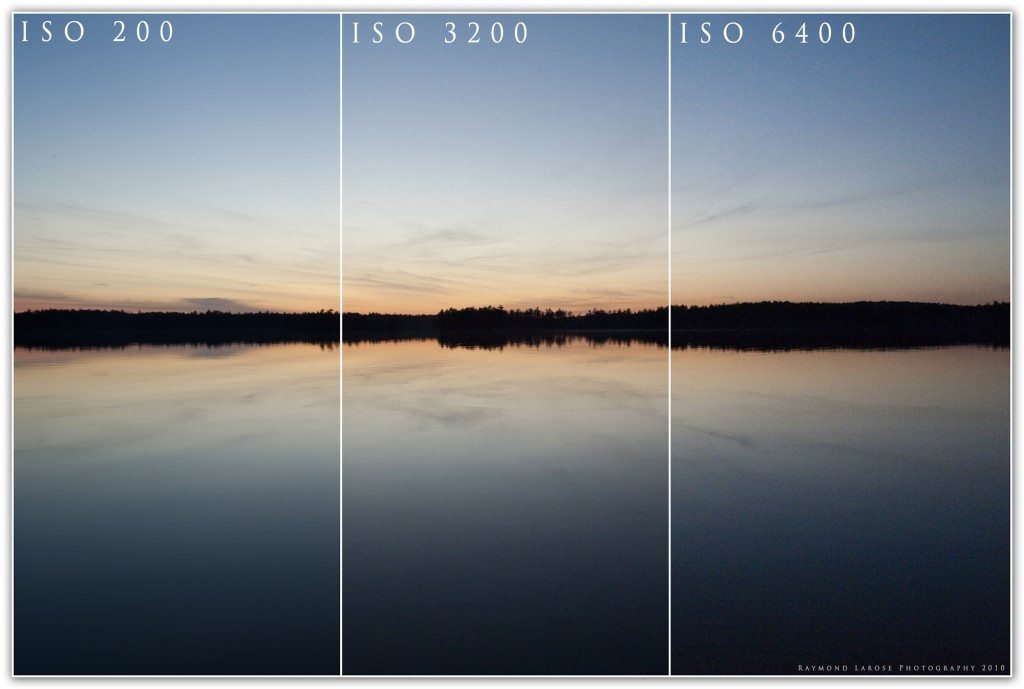
Here is an image from photographer Ray Larose showing the effect of using different ISOs on the same scene. You need to click the image to get the full-res view to actually see the difference.
Grain vs Blur
Which is better – a sharp, noisy, grainy image or a slightly blurry image. I always favor the sharp image. There are post-processing techniques that can help with digital noise, but there is nothing out there that will make your shaky, blurry image into a sharp one. Why do I make this comparison? Often ISO is used as a trade-off with shutter speed. ISO is typically a low-light factor, meaning that we start thinking about ISO and managing our ISO when we are in a challenging situation and our shutter speed is getting slower and slower. As the shutter speed gets slower, you have a higher chance of blur. Thus, to maintain a non-blurry shutter speed we bump up the ISO to increase the sensitivity of our camera. Better to have a grainy, noisy image of a smiling bride than to have a blurry streak of her face that is barely recognizable. What I’m saying is to GET THE SHOT. This advice is primarily for low-light, handheld situations. Tripods change everything.
ISO & Film
In the days of film shooting, ISO was called ASA (American Standards Association) or “film speed” and was a measure of the sensitivity of film. High ISO films are known for their grain, or texture. Different from digital noise, film grain is often pleasing to a degree, especially in black & white images. The disadvantage with shooting film is that to change the ISO meant unloading the film and then loading a different ISO roll of film into the camera. ISO was a property of the film you were using, not an adjustment made on the camera. Now we just use a dial to change the ISO from picture to picture, but we pay for the convenience with digital noise.
Scenarios
Theater/Musical Performance
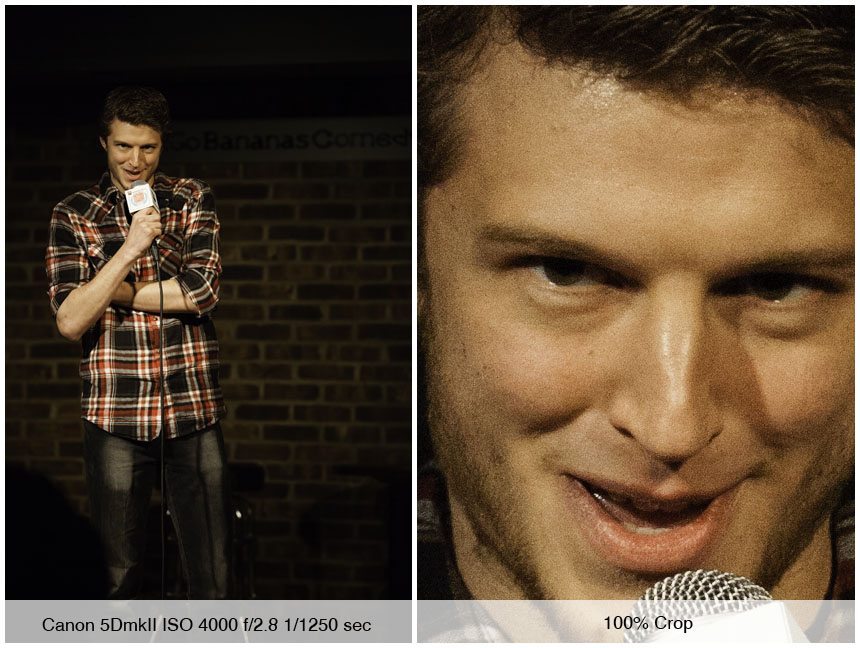
Live performance locations are almost always dimly lit to create a dramatic atmosphere and cast the audience in darkness. These factors often make these locations a photographers worst nightmare. The situation becomes further complicated if there is action on the scene that needs to be stopped by a fast shutter speed. These situations often call for a low f-stop, a fast shutter speed, and a high ISO. Here is a close-up of a comedian shot at ISO 4000 on a Canon 5DmkII. The Canon 5DmkII is an exceptional camera with great high ISO noise capability.
Cathedrals
Cathedrals, churches, and other holy places are often breathtaking. While there is usually plenty of light for our eyes to see inside, our cameras perceive this environment as incredible dark. This is because your eye is capable of seeing at up to an equivalent ISO of 60,000! To make our situation more complicated, these locations tend to prohibit use of tripods or flash. Often, the only option is to open up the aperture, increase the ISO, and hold the camera as steady as possible.
Weddings
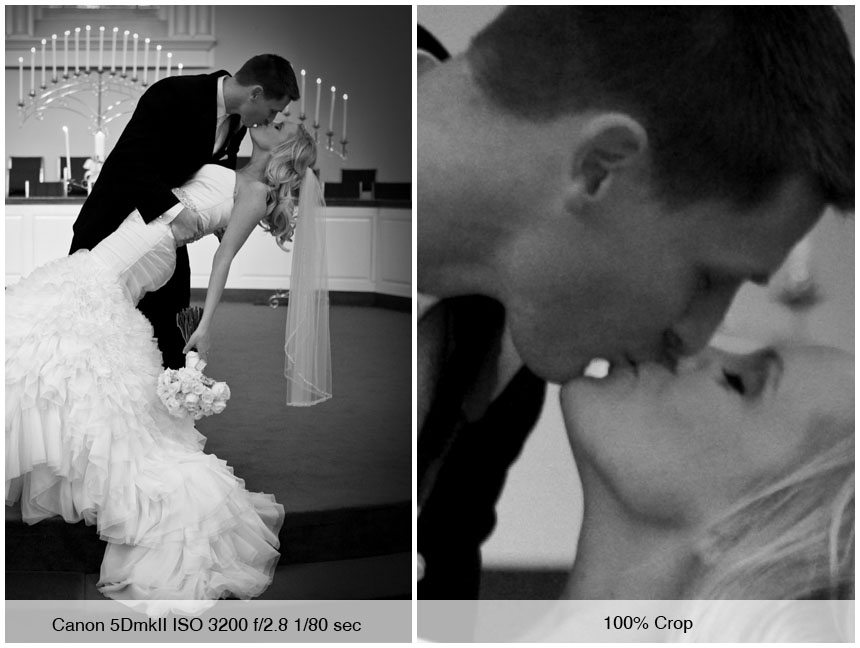
Speaking of churches – that is usually where weddings take place. Unfortunately the option for improving the lighting is often overlooked in wedding planning and we are forced to shoot in dungeon-like conditions. Flash is generally not acceptable during the ceremony, which leaves us to use or a tripod or monopod and high ISOs.
Sports
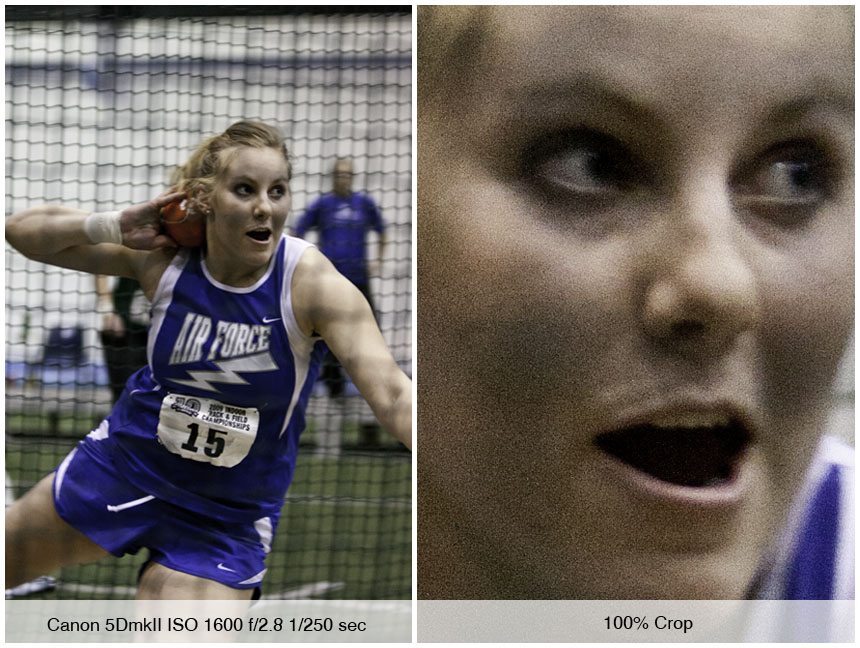
Sports are another situation in which we want to capture fast moving action. If the sports are taking place indoors, such as this track meet (below), and without flash setup, the shoot can be a real challenge. We’ve got to crank up the ISO to get the shutter speed fast enough to stop the action.
Night Life
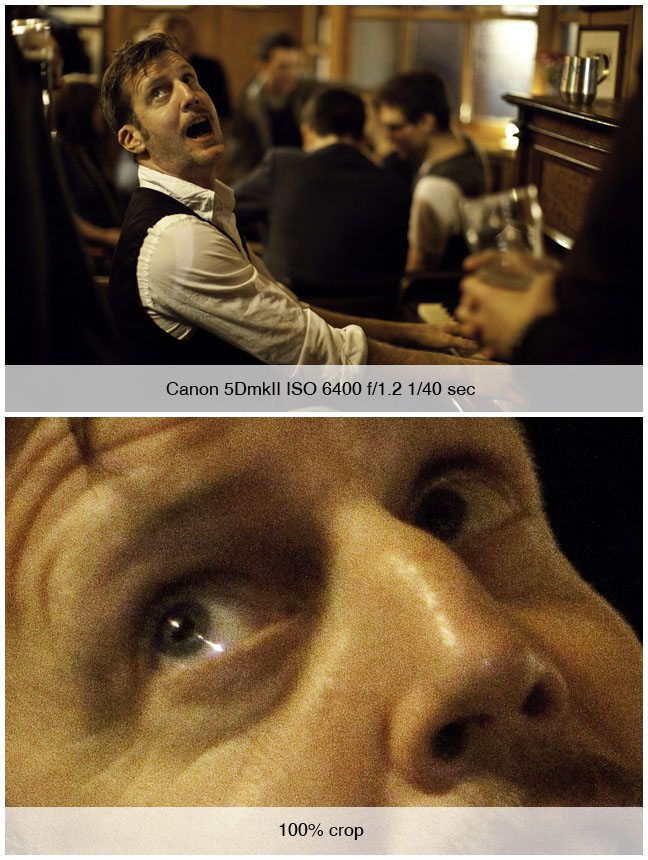
This is often a situation where those incredible cameras in the smartphones fall short. They have no low light capability, and when you are out with your friends in those dingy bars taking questionable photographs, it shows. At this pub in London I cranked my ISO up to 6400 to capture a sharp image of the pianist and walked away with a usable image.
Advanced Topics
Like always, there is so much more to ISO than these basics. Keep on the lookout for the advanced ISO article that will cover topics such as using high ISOs to make calculations for long exposures, reducing digital noise during long exposures, and the difference between native and artificial ISOs.

Leave a reply