
If you’re just now joining us, you may want to take a look at Part 1 of this mini-series which provides a primer on the equipment you’ll need to photograph waterfalls.
Phew! Now the we have all the fancy shmancy gear, we can finally get to taking a photograph – maybe one that looks like THIS…
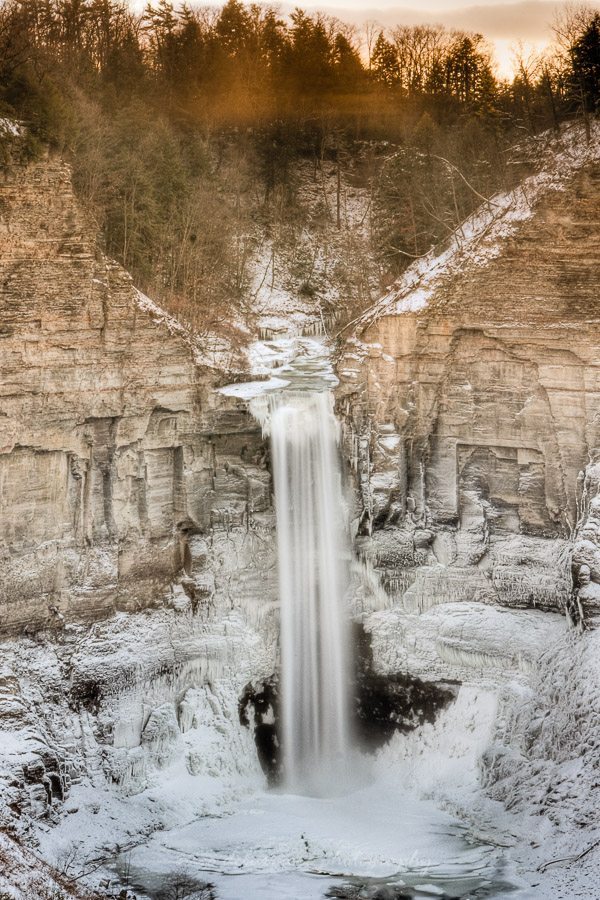
Taughannock Falls
The most important consideration when creating long exposure waterfall photographs is the lighting. The scene needs to be in the shade. The dappled light that looks so pretty to your eye will not look so pretty with your long exposure, as the shady parts are exposed correctly and the bright areas become unsightly burned whites in your image.
How best to avoid sunlit scenes? Photograph waterfalls on cloudy, overcast days. If the day will have “nice” clear weather, photograph your waterfalls at sunrise or sunset time, or photograph when they are in the shade of a mountain or cliff. If the waterfall is in shade, but other parts of the scene are in the sun, try to compose to exclude the sunlit areas.
These next two photographs are of a tall waterfall in Iguazu National Park in Argentina. The first image has sunlit areas that are overexposed and distracting. In the following image is composed to exclude the majority of the blown-out sunlit areas. However, by changing the composition I lose the bridge and more importantly the people on the bridge. Those people give this photograph an important sense of scale. The solution here is to simply come back at a different time during which the whole scene is shaded, or on an overcast day.
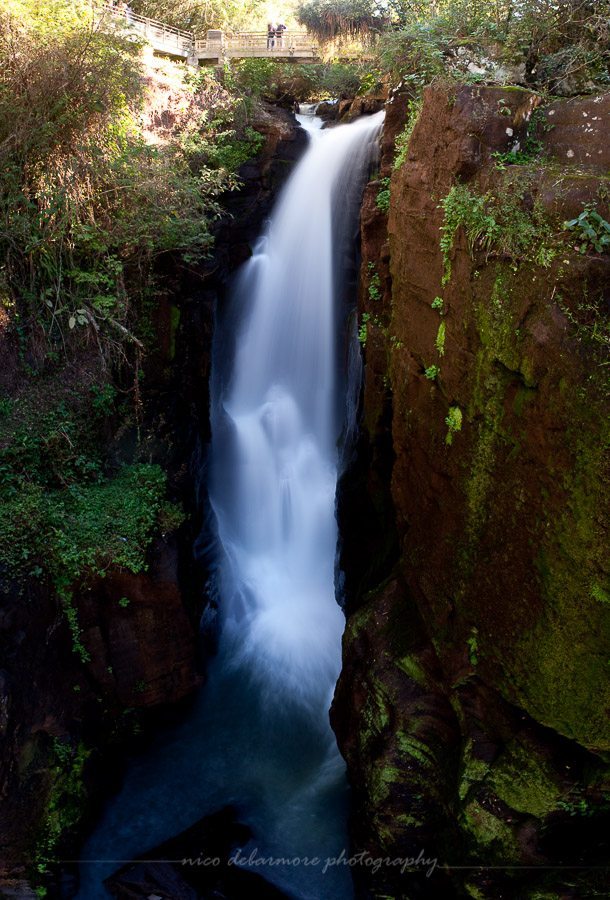
Here the sunlit areas are blown out and distracting
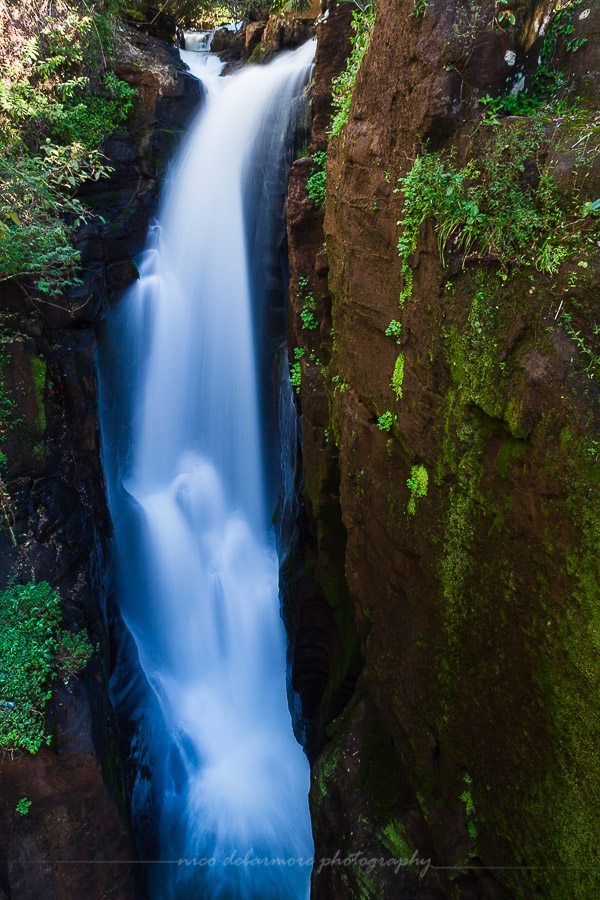
Change composition to minimize sunlit areas, at the expense of losing the sense of scale
It is possible to add a great deal of neutral density and photograph a long exposure of a sunlit waterfall, but this will require many filters and likely stopping the lens down to f/22 which will affect your image sharpness due to refraction. Additionally, a long exposure of a waterfall seems unnatural when lit by sun, perhaps because of the sharper, harsher shadows.
Now that you’ve found your shaded cascade, set-up the tripod, mount the camera, and dial in some settings that allow for a long shutter speed. I often work with apertures ranging from f/11 to f/16 when photographing landscapes. Dialing in the ISO to the lowest native setting (usually ISO 100) will allow you to not only extend shutter speed, but also brings out your cameras highest resolution. By stopping down to f/16 and setting ISO to 100, and adding a polarizer, you should hopefully be in the area of 2+ sec shutter speed. If these things don’t make sense to you, take a look at my basic write-ups on aperture, shutter speed, and ISO.
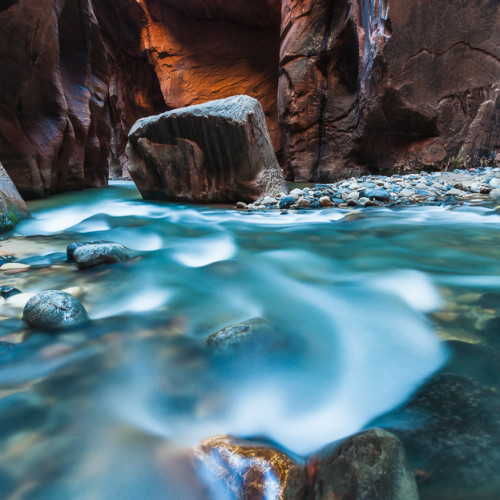
Now that we’ve got the technicalities of camera settings taken care of, let’s make sure to pay ample attention to composition. In the long exposures, you’ll notice patterns and lines that are revealed which were not visible to the naked eye. The patterns and flows of the water can create interesting leading lines that boost your composition. While the silky flows of water are interesting, don’t forget that what makes them so interesting is their softness in contrast to the hard, sharp, static objects. Something in the foreground that isn’t moving, such as a rock or log, can go a long ways in making the photograph a keeper.
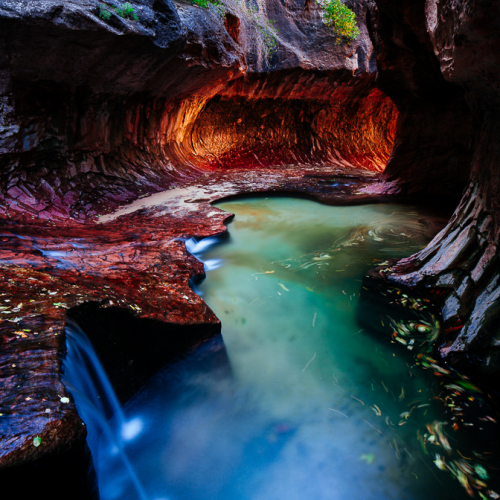
This last image is an example of the beautiful patterns and swirls that are revealed through long exposure of moving water. In this photograph the soft movement of the water contrasts with the solid unmoving rock wall to create an interesting composition. The simple composition with only two elements – water and rock – creates an abstract, simple landscape image. I feel it is sort of elemental, a commentary on the never-ending wear of water eroding the canyon walls.
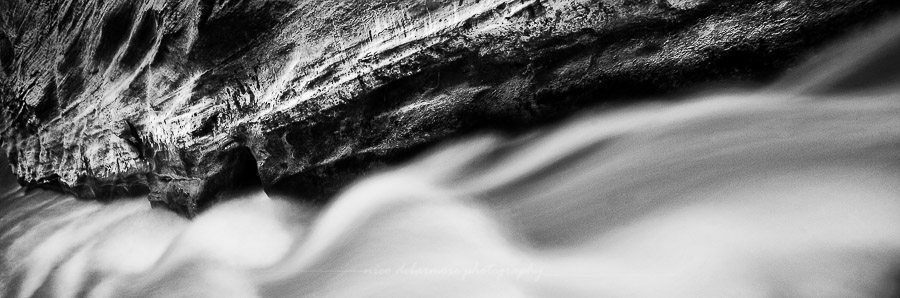
The flow of the Virgin River becomes an abstraction over time, creating ribbon-like patterns.
Well, that’s it for this basic primer on waterfall and moving water photography. If you thought that was simple, don’t worry, it can get much more complicated. The best way to learn this stuff is to get out there, find some water, and photograph. Remember, this could be a nearby stream or even some fountains downtown.
For more inspiring examples of moving water, visit my Rivers & Streams gallery.
Leave a reply